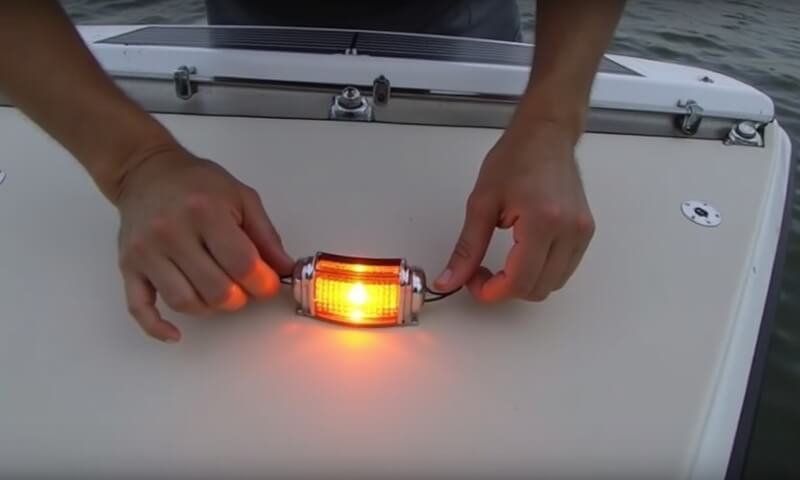
LED navigation lights are brighter, draw far less power, and survive harsh marine conditions for years. This guide walks you through the entire upgrade: why LEDs matter, how to plan the job, the exact installation steps, and the little maintenance habits that keep the new lights shining season after season.
Why Upgrade to LED Navigation Lights
Leaving incandescent bulbs behind is more than a cosmetic tweak. LEDs reduce electrical load, sharpen your night-time profile, and meet modern safety regulations that inspectors look for during routine checks.
Energy Efficiency and Service Life
An LED sidelight pair typically consumes under one watt, versus ten watts from classic fixtures. That 80-percent savings means radar, chartplotter, and fridge can share the same battery bank without anxiety on an overnight passage. Rated lifespans of 30,000–50,000 hours translate to decades of real-world use.
Improved Visibility and Safety
Solid-state diodes maintain color accuracy for the green and red sectors, helping oncoming traffic judge your direction instantly. The extra luminosity cuts through haze and spray, buying you valuable reaction time when it’s busiest on the water.
Meeting International & Inland Rules
The Collision Regulations specify minimum ranges and precise beam arcs for each navigation light. Quality LED fixtures carry third-party certification marks showing they’ve been photometrically tested; choose units labelled for your boat’s length to avoid compliance headaches later.
----- 👀 A quick peek below deck…
While you’re reading about boat maintenance and common issues on board, why not take a moment to sneak a peek inside the Easysea community? It’s a free space built for sailors like you—where we talk about real problems, swap smart solutions, and share stories from life at sea. Inside, you’ll find:
⚓ Problems & Solutions – get answers from people who’ve been there.
🧰 Logbook and boat maintenance – see what others are doing to keep their boats in shape.
🌊 Easy Chat – hang out, ask questions, and stay in the loop. 👉 Curious? Hop on board and join us.
It’s free.
Pre-Installation Planning
A smooth refit starts at the nav table. Sketch a wiring diagram, measure mounting heights, and gather documentation so you drill only once and pass every inspection.
Confirm Legal Requirements for Your Vessel
Powerboats under 12 metres need a masthead light at least one metre above the sidelights; sailboats adding a tricolour at the masthead must still carry deck-level sidelights when under power. Check any inland deviations before finalising positions.
Choosing Certified LED Fixtures
Select lights stamped “2 NM” or “3 NM” as required for your hull length. Match housing colour to your topsides for a factory look, and avoid un-certified strip lights marketed as navigation lights—those can fail brightness tests and void insurance claims.
Mapping the Wiring Route
Trace the shortest path from each fixture to the DC distribution panel, steering clear of fuel lines and engine-room hot spots. Decide whether to reuse existing wire or pull fresh 16 AWG tinned duplex cable for long-term reliability.
Tools and Materials Checklist
Lay everything out before picking up the drill so you’re not scrambling mid-project.
Electrical Tools and Connectors
Wire stripper/crimper, multimeter, heat-shrink butt splices, adhesive-lined heat-shrink tubing, and cable ties cover 90 percent of installs.
Sealants and Corrosion Protection
Marine silicone or polyurethane sealant, dielectric grease for connectors, and liquid electrical tape keep salt and moisture where they belong—outside the circuit.
Step-by-Step Installation Guide
Work methodically, and you can complete most upgrades in an afternoon.
Isolate Power and Remove Old Lights
Turn the battery switch to Off and verify with a multimeter. Unscrew the old housings and label positive and negative conductors for easy reference.
Position, Mark, and Drill Mounting Holes
Dry-fit the new light, ensuring the lens arc lines up perfectly with the intended sector. Mark holes with a fine-tip marker, drill at low speed, and lightly countersink to prevent gelcoat chipping.
Make Waterproof Electrical Connections
Crimp tinned butt splices, slide heat-shrink over the joints, and warm until adhesive beads out the ends. Through-deck passes benefit from IP-rated gland connectors for extra security.
Secure Fixtures and Tidy Cables
Bed each baseplate in sealant, tighten screws just until the compound oozes slightly, and route cables with cushioned clips every 40 centimetres to eliminate chafe.
Final Power-Up and Beam Check
Restore power, switch on the navigation-light circuit, and walk 360 degrees around the vessel at dusk. Confirm the red and green sectors cut off cleanly and that no deck hardware masks the beams.
Troubleshooting and Common Pitfalls
If a light stays dark, first check polarity—LEDs illuminate only when positive and negative are correct. Flickering typically means a loose crimp or moisture-wicked splice. Dim output across multiple lights often signals an undersized wire gauge or corroded negative bus.
Maintenance Tips for Long-Lasting LEDs
Rinse salt spray from lenses after each outing, and dab dielectric grease on exposed stainless screws every six months. Inspect heat-shrink joints once per season; catching a green-tinged connector early avoids mid-passage surprises.
Frequently Asked Questions
Can I mix LED sidelights with my existing incandescent anchor light? Yes, but the different loads may confuse an indicator panel. Ideally dedicate separate breakers.
Do I need an extra fuse? Every circuit should have over-current protection. If your panel slot lacks a breaker, add an in-line fuse rated just above the LED pair’s draw.
Quick Reference Cheat-Sheet
- Minimum range: 2 NM sidelights for vessels under 20 m; 3 NM masthead for 12 m and above.
- Wire gauge: 16 AWG tinned duplex up to 6 m run.
- Heat-shrink temp: About 110 °C until adhesive flows.
- Sealant cure: 24 h before heavy seas.
Print and laminate this card; tape it by the breaker panel to keep crucial figures at your fingertips during night passages.


Leave a comment
This site is protected by hCaptcha and the hCaptcha Privacy Policy and Terms of Service apply.