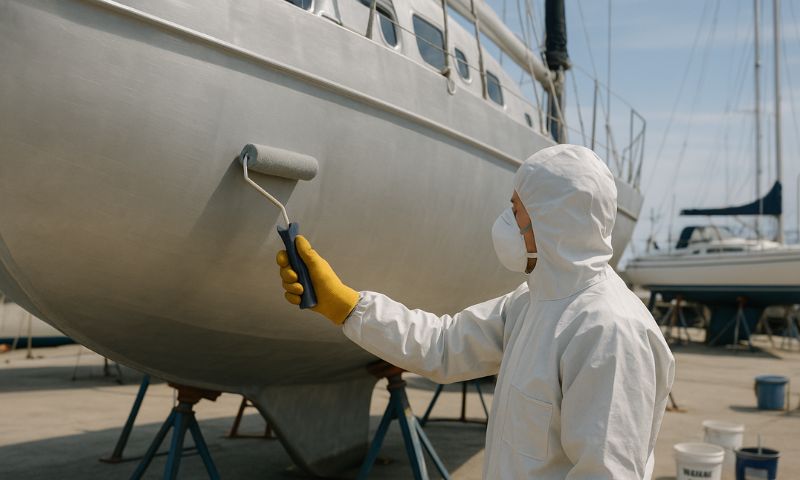
Aluminum sailboats are known for their durability, lightweight strength, and resistance to corrosion—but even aluminum needs protection. Over time, exposure to saltwater, UV rays, and weather can fade or damage the protective coatings that shield the metal beneath. Whether you’re restoring a classic aluminum cruiser or refreshing your performance sailing yacht, painting your aluminum hull is both a technical process and a statement of care.
This guide walks you through each stage of painting an aluminum sailboat—from preparation and priming to application and protection—so you can restore shine, enhance resistance, and ensure your hull performs as beautifully as it looks.
Why Painting an Aluminum Sailboat Matters
While aluminum doesn’t rust like steel, it does oxidize. This oxidation layer can protect the metal in some conditions, but in the harsh marine environment, especially in saltwater sailing, unprotected aluminum is vulnerable to pitting, discoloration, and structural decay over time.
Paint acts as a critical barrier between the metal and the environment. It enhances the boat’s aesthetics, makes cleaning easier, and—when done correctly—helps prevent galvanic corrosion, especially when paired with proper anodes and insulation. For aluminum sailboats that spend significant time in the water or are moored in marinas with mixed metals nearby, a high-quality paint job is essential to long-term hull health.
Selecting the Right Paint for Aluminum Hulls
Not all marine paints are safe for aluminum. In fact, some antifouling paints and primers contain copper, which can cause galvanic corrosion when in direct contact with aluminum. For this reason, always choose copper-free and aluminum-compatible systems.
The painting process usually includes:
-
An etching or conversion primer to prepare the bare aluminum,
-
An epoxy barrier coat to seal the surface,
-
And a topcoat, such as polyurethane, for aesthetics and protection.
If your sailboat remains in the water for long periods, you may also apply an antifouling paint formulated for aluminum hulls. Paint systems from brands like Interlux, Pettit, or Hempel often offer dedicated aluminum-compatible solutions, and it’s vital to follow their instructions to the letter.
Preparing the Aluminum Surface for Painting
Preparation is everything—especially with aluminum. The surface must be clean, chemically ready, and slightly roughened to ensure proper adhesion. Start by washing the hull thoroughly with a degreasing soap to remove salt, dirt, and oils.
Next, mechanical abrasion is essential. Sandblasting is ideal for older or heavily oxidized surfaces, but if you’re working by hand, use 80-grit sandpaper or abrasive pads to scuff the surface thoroughly. Pay special attention to weld seams and corners, where contaminants or oxidation may accumulate.
Once sanded, immediately wipe down the hull with a solvent such as acetone or a proprietary aluminum cleaner to remove residues and prevent the formation of a new oxide layer. Aluminum begins oxidizing within hours, so it’s important to move quickly from cleaning to priming.
Applying the Etching Primer: The First Layer of Defense
Unlike fiberglass or wood, aluminum requires a conversion or etching primer that chemically bonds with the metal. These primers often have a greenish or yellow tint and should be applied in a thin, even layer with a sprayer or foam roller.
This primer is not optional—it’s what allows all other coatings to properly adhere to the aluminum. Once cured, it creates a uniform, bondable surface that resists corrosion and supports subsequent paint layers. Most manufacturers specify a precise window for overcoating—typically within a few hours—so timing is critical.
----- 👀 A quick peek below deck…
While you’re reading about boat maintenance and common issues on board, why not take a moment to sneak a peek inside the Easysea community? It’s a free space built for sailors like you—where we talk about real problems, swap smart solutions, and share stories from life at sea. Inside, you’ll find:
⚓ Problems & Solutions – get answers from people who’ve been there.
🧰 Logbook and boat maintenance – see what others are doing to keep their boats in shape.
🌊 Easy Chat – hang out, ask questions, and stay in the loop. 👉 Curious? Hop on board and join us.
It’s free.
Building a Barrier Coat with Epoxy Primer
After the etching primer, an epoxy barrier primer is applied to build thickness, seal the surface, and enhance impact resistance. This step is especially important for sailboats that may encounter debris or grounding in shallow waters. Apply one or more coats depending on the product’s instructions, lightly sanding between coats if required.
The epoxy coat also acts as a moisture barrier, reducing the risk of galvanic action below the waterline. Choose a product that’s compatible with both your primer and your chosen topcoat—brand consistency often helps reduce risk of incompatibility.
Finishing with a Topcoat: Gloss and Protection
The final coat provides UV protection, gloss, and visual appeal. Most aluminum sailboats benefit from a two-part polyurethane topcoat, which offers exceptional durability, color retention, and a smooth, professional finish.
Apply the topcoat using the roll-and-tip method or a high-volume low-pressure (HVLP) spray gun for best results. Work in small sections to avoid laps or drips. If painting outdoors, choose a calm, dry day with minimal wind and moderate temperature. Dust or dew can ruin an otherwise flawless application.
Depending on your taste, you can choose high-gloss, satin, or matte finishes. Some owners opt for light-colored hulls to reflect sunlight and reduce surface temperature in warmer climates.
Below the Waterline: Antifouling for Aluminum Sailboats
If your sailboat stays afloat for extended periods, you’ll want to apply an aluminum-safe antifouling paint below the waterline. These formulations avoid copper and use biocides like zinc pyrithione or Econea™ to prevent marine growth.
Before applying, sand the epoxy barrier lightly to allow mechanical adhesion. Then roll on the antifouling paint in even coats, observing recoat times and immersion windows. Some aluminum boats may also use lifting strakes or trim tabs—ensure these are also protected with compatible coatings or anodes.
Tips for Maintaining Your Painted Aluminum Hull
Once painted, aluminum requires less day-to-day maintenance than many other hull materials, but care is still needed. Rinse your hull after every sail, especially after saltwater exposure. Use soft sponges and avoid harsh or acidic cleaners.
Inspect the hull regularly for scratches, blisters, or signs of delamination. Spot-repair any damage promptly using the same paint system. And remember: even the best paint won’t prevent galvanic corrosion without proper zinc or aluminum anodes placed strategically on the hull and saildrive.
Common Mistakes to Avoid When Painting Aluminum Boats
Many paint jobs fail not because of the products used, but because of poor surface prep or incorrect primer choice. Never apply paint directly to bare aluminum without a conversion primer. Don’t use copper-based antifouling. And don’t let the surface sit exposed for too long after sanding—aluminum oxidizes fast.
Other missteps include skipping the degreasing step, painting in high humidity, or applying thick topcoats that sag or peel. Always read and follow the technical datasheets for each product you use—and when in doubt, ask the manufacturer.
Final Thoughts: Painting as Part of Sailboat Ownership
Owning an aluminum sailboat means embracing a unique material—strong, lightweight, and built to last. Painting it properly isn’t just about looks; it’s about extending the life of your hull and protecting your investment for years to come.
Done right, a painted aluminum boat is both rugged and refined. It stands up to ocean crossings, coastal cruising, and the wear of daily sailing. Whether you’re doing the job yourself or overseeing a professional application, understanding the process helps you make smarter choices and take pride in every rivet, weld, and wave you cross.


Leave a comment
This site is protected by hCaptcha and the hCaptcha Privacy Policy and Terms of Service apply.